REVIEW · MONTREAL
Leather belt making workshop
Book on Viator →Operated by Flechr By Kimberly Fletcher · Bookable on Viator
Want to wear something you made? In Montreal’s Plateau Mont-Royal, you can learn leather belt making at Flechr By Kimberly Fletcher and leave with a real, wearable accessory you shaped yourself, not a souvenir. Kimberly Fletcher guides you step by step, and the class is set up for beginners who want their first belt to look good and last.
What I like most is the hands-on pacing: you learn how to choose leather, cut and shape it, and then assemble it into a belt, with finishing techniques to make it truly yours. The other big win is the small group size, capped at 4 travelers, so you get help when you get stuck. The main consideration: if you’re very noise-sensitive, plan for a few hammer blows during the process.
In This Review
- Key Highlights You’ll Feel Right Away
- Leather Belt Making in Montreal: What You’ll Create in About 2.5 Hours
- Flechr By Kimberly Fletcher: Where the Class Happens and How It Feels
- The Workshop Flow: From Leather Selection to Finished Belt
- 1) Getting Started and Understanding the Leather
- 2) Cutting and Shaping Your Belt
- 3) Assembling the Belt Pieces
- 4) Finishing Techniques for a Belt That Looks Intentional
- 5) Wrap-Up and Leaving With Your Belt
- Why the Small Group (Max 4) Matters More Than You Think
- Noise, Timing, and Mental Prep: The Real-World Considerations
- Value for Your Time: Why This Belt Workshop Feels Worth It
- Who Should Book This Workshop (and Who Might Want Something Else)
- Practical Tips Before You Go (So You Enjoy It More)
- Should You Book Leather Belt Making with Flechr By Kimberly Fletcher?
- FAQ
- How long is the leather belt making workshop in Montreal?
- Where does the workshop start?
- Is the class offered in English?
- Do I need prior leather crafting experience?
- What’s the maximum group size?
- Is there an age recommendation?
- Is the workshop noisy?
- Are service animals allowed?
- What’s the cancellation policy?
Key Highlights You’ll Feel Right Away
- Small group, up to 4 people for real coaching instead of watching from the sidelines
- A beginner-friendly belt plan: leather selection, cutting/shaping, assembly, finishing
- English instruction for an easy first-time craft experience
- Plateau Mont-Royal studio location with public transit nearby
- A few hammer blows means noise matters if you’re sensitive
Leather Belt Making in Montreal: What You’ll Create in About 2.5 Hours
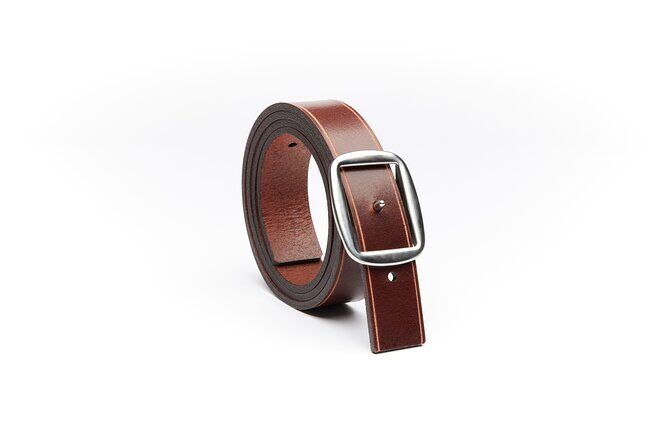
This workshop is built around a clear goal: make your own leather belt. The class runs about 2 hours 30 minutes, which is just enough time to go from blank leather to a finished belt you can actually wear (and show off without having to explain what happened in the craft aisle).
You’ll practice the core steps of leathercraft in a beginner-friendly way. First comes choosing the right leather, then cutting and shaping it so it matches the belt form you’re working toward. After that, you assemble the pieces, and finally you add finishing techniques so the belt looks intentional instead of temporary.
If you’ve ever seen leatherwork that looks clean and “pro,” this is a good route to understand where that look comes from. It’s not magic. It’s process: measuring, cutting cleanly, getting pieces together neatly, and finishing with care.
A few more Montreal tours and experiences worth a look


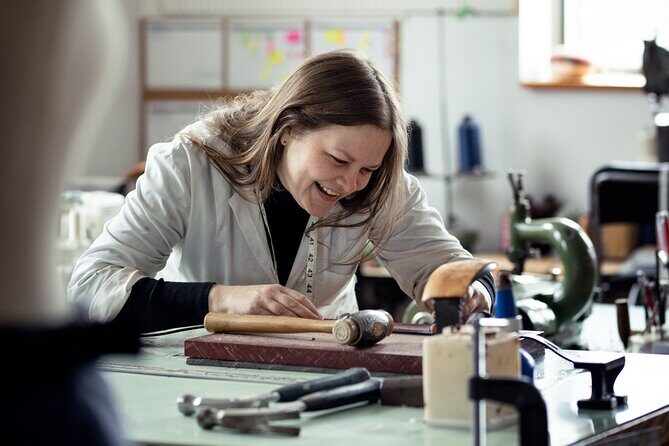
Flechr By Kimberly Fletcher: Where the Class Happens and How It Feels
The class meets at 5450 Rue de Bordeaux, Montréal, QC H2H 2A8, in the Plateau Mont-Royal area. It’s an in-studio experience, and the activity ends back at the same meeting point. Since it’s in Montreal, you can plan your day around it without scrambling across town.
It’s also practical for modern travel: the workshop uses a mobile ticket, and you should receive confirmation at booking. It’s offered in English, which matters because craft classes often live or die on clarity, especially when you’re learning techniques on your first try.
The group size is capped at 4 travelers, so this isn’t a “sit and observe” class. It’s closer to a coached workshop. That setup is what helps beginners keep up, ask questions, and fix small issues before they become bigger problems.
A few more on-the-ground notes that actually matter: the studio is near public transportation, service animals are allowed, and it’s recommended for ages 13 and over. If you’re traveling with a kid who’s mature with hands-on tasks, this can work well. If noise bothers you easily, read this part carefully—there are a few hammer blows needed during the belt making.
The Workshop Flow: From Leather Selection to Finished Belt
The best way to think about this class is as a sequence of mini wins. Each stage builds confidence, and each one teaches a skill you can reuse later if you keep crafting after the workshop.
1) Getting Started and Understanding the Leather
You begin with basics of leathercraft. That includes how to select the right type of leather, which is more important than most people expect. Leather isn’t one-size-fits-all. You’ll learn what to think about so your belt doesn’t end up too stiff, too soft, or just annoying to work with.
This is also where you start learning the mindset: good results come from making smart choices early, not from rushing at the end. The goal is durability and a clean finish, so you’ll focus on the belt as a wearable object, not just a craft project.
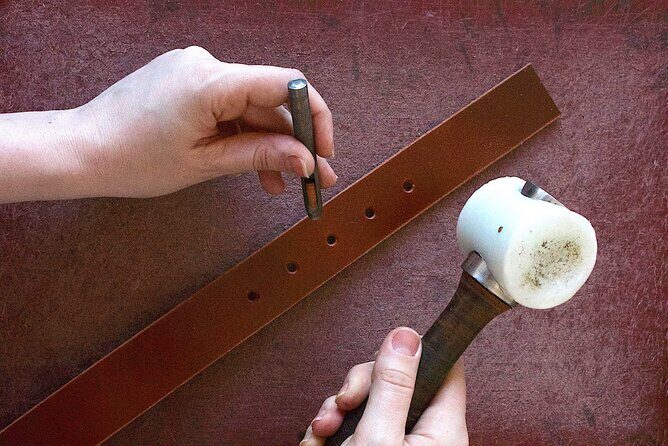
2) Cutting and Shaping Your Belt
Next comes cutting and shaping. This is the part where the project starts looking real. You’ll learn how to cut and shape the belt so it follows the right form and stays consistent—because a belt needs to sit right when you wear it.
For first-timers, cutting can feel intimidating. But the way this workshop is structured makes it manageable: you’re guided through the steps, and the small group size helps you get corrections quickly if your cuts or shapes need adjustment.


3) Assembling the Belt Pieces
After shaping comes assembly. This is where your leather stops being flat pieces and becomes something functional. The class covers assembling the pieces into a belt, focusing on getting them put together in a way that holds up.
This is also where the “few hammer blows” piece may come in. If you’re noise-sensitive, this is the moment to mentally prepare. It’s not constant pounding—just enough to do the craft work correctly.
4) Finishing Techniques for a Belt That Looks Intentional
Finally, you’ll learn finishing techniques to make the belt unique. Finishing is what turns a project from okay to polished. It’s also where you can add your own style through the choices and small details you’re taught.
The finishing stage is especially satisfying because you see the end result coming together fast. You’re not just learning a task—you’re learning how leathercraft professionals make things look finished on purpose.
5) Wrap-Up and Leaving With Your Belt
At the end, the activity returns you to the meeting point. The real takeaway is that you’ll have a belt you made in a single afternoon. That matters because you’re not just buying instruction—you’re practicing it.
Why the Small Group (Max 4) Matters More Than You Think
A class capped at 4 travelers can sound like a nice perk. In practice, it changes everything.
Leathercraft has tiny details that can throw you off: alignment, cut consistency, and when to slow down and when to press forward. With a small group, you’re more likely to get immediate feedback instead of finishing a step and hoping it’s right.
It also makes the workshop less stressful. If you’re a true beginner, you’re already juggling new motions and new vocabulary. The best craft teachers keep you calm, and the structure here supports that.
The reviews point strongly to Kimberly’s teaching style—patience and even a sense of humor. That combination matters because leathercraft is hands-on and occasionally stubborn. You need someone who can keep the process friendly while still helping you achieve good results.
Noise, Timing, and Mental Prep: The Real-World Considerations
This workshop is hands-on, which means you should plan for attention and a little physical focus. It’s only 2 hours 30 minutes, but in that time you’re moving through multiple stages: selecting leather, cutting, shaping, assembling, and finishing.
If you have high sensitivity to noise, note the workshop includes a few hammer blows. You don’t want to discover that late. If noise is a trigger for you, consider bringing ear protection, or at least mentally prepare for brief moments of impact sounds.
Also plan your day around concentration. This isn’t the kind of class where you can drift and check messages. You’ll get more from the workshop if you treat it like a focused session and not a stop you squeeze in between attractions.
Value for Your Time: Why This Belt Workshop Feels Worth It
Even without getting into pricing (not provided here), the value question is straightforward: you’re spending a half-day learning a skill and producing something usable.
Most travel activities give you photos. This gives you a belt. And because it teaches the basics—leather selection, cutting/shaping, assembly, and finishing—you’re not just doing steps. You’re building an understanding of what makes leathercraft work.
The other value angle is the teaching style. The positive feedback you’ll likely feel when you attend is about instruction quality: clear guidance, patience, and help that keeps beginners moving. In craft classes, that’s the difference between a frustrating experience and a satisfying one.
And because the class is in English with a tight group limit, you’re less likely to feel lost. That clarity is worth a lot if you’re new to leatherwork.
Who Should Book This Workshop (and Who Might Want Something Else)
This workshop fits best if you want a hands-on creative skill and you’re open to learning by doing. It’s especially good for beginners, since no prior leather crafting experience is required.
It also works well for travelers who like experiences with a tangible outcome. If you enjoy making things—scars-free souvenirs, not fragile memories—this should click.
It may not fit as well if:
- You’re extremely noise-sensitive because of a few hammer blows.
- You want something more passive, like watching a demonstration instead of making your own belt.
Age recommendation is 13 and over, so it can be a meaningful teen activity too, especially for older kids who can follow steps and stay focused.
Practical Tips Before You Go (So You Enjoy It More)
A few small choices before the workshop can make the class easier.
First, plan to dress comfortably. You’ll be working with materials, and you’ll want clothing that lets you move without fuss. Also, be ready to focus. Leathercraft rewards attention to detail.
Second, if you’re coming from sightseeing, give yourself a little buffer time so you arrive calmer than rushed. A class like this goes better when you can listen fully and don’t feel behind.
Third, if you’re worried about noise, treat it like a known feature. The class does use a few hammer blows, and that’s part of the real process. Having a plan for it lets you stay relaxed.
Should You Book Leather Belt Making with Flechr By Kimberly Fletcher?
Yes—if you want a hands-on craft experience in Montreal that ends with something wearable, and you’re okay with brief hammer-blow noise. The workshop’s structure is beginner-friendly, and the small group size (up to 4) gives you better coaching instead of a crowded classroom vibe.
I’d recommend booking if you value learning practical steps—how to choose leather, cut and shape accurately, assemble the belt, and finish it properly. That’s the kind of knowledge you can actually use again, even if this is your only leather project.
If noise sensitivity is a big issue for you, it’s worth taking that hammer-blow note seriously and planning accordingly. Otherwise, this is the type of experience that feels personal fast—because you’re making something with your hands.
FAQ
How long is the leather belt making workshop in Montreal?
It runs for about 2 hours 30 minutes.
Where does the workshop start?
The meeting point is 5450 Rue de Bordeaux, Montréal, QC H2H 2A8, Canada. The activity ends back at the meeting point.
Is the class offered in English?
Yes. The workshop is offered in English.
Do I need prior leather crafting experience?
No. It’s designed for beginners, and no prior leather crafting experience is required.
What’s the maximum group size?
The class has a maximum of 4 travelers.
Is there an age recommendation?
Yes. It’s recommended for 13 years and over.
Is the workshop noisy?
There is high sensitivity to noise noted, and a few hammer blows will be necessary to create your belt.
Are service animals allowed?
Yes. Service animals are allowed.
What’s the cancellation policy?
You can cancel for free. You must cancel at least 24 hours in advance for a full refund.